Forge
AI-powered custom keycap design: from text prompt to 3D model in seconds
How It Started
Andrew Wu, a mechanical engineering major and friend of mine, had this idea: what if you could design custom mechanical keyboard keycaps using AI? Just type a description and get a 3D model ready for printing. I teamed up with Andrew and another friend, Josh, and within a week we had a working prototype.
The division of labor was clear. Josh set up the initial backend pipeline and API architecture. I built the frontend, the user interface, all the visual experience stuff. Later, I linked everything together and improved the backend pipeline, specifically the prompting strategy to get better results from the AI models.
The Team
Building It
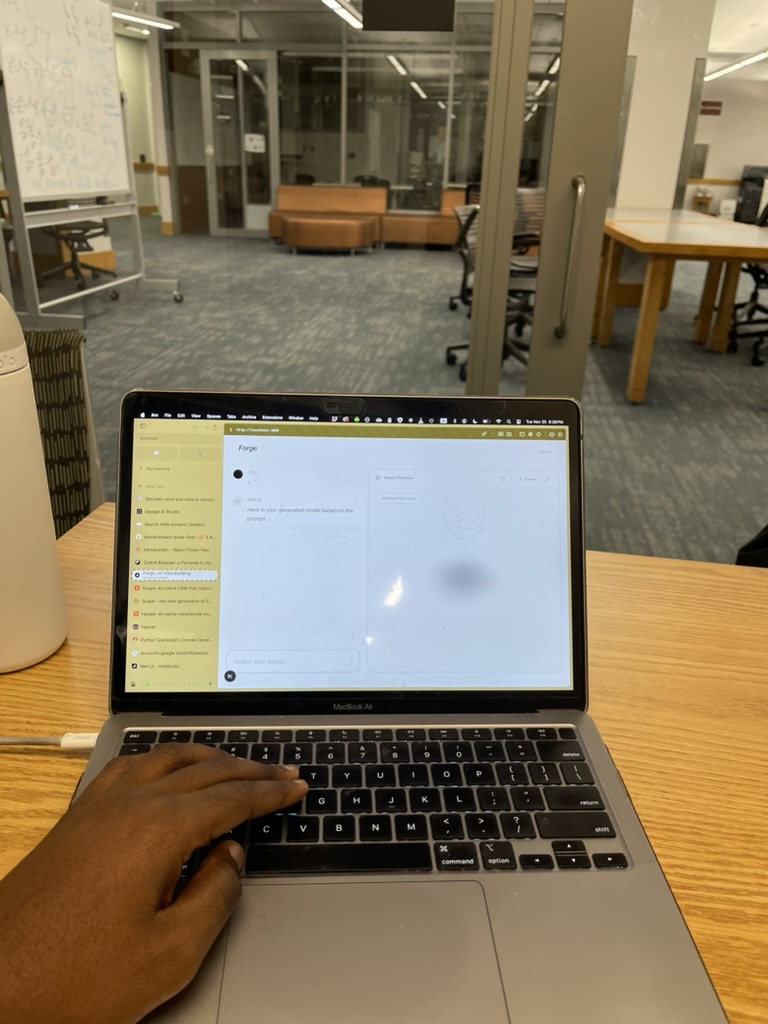
Late night hacking sessions getting the pipeline and frontend working.
How It Works
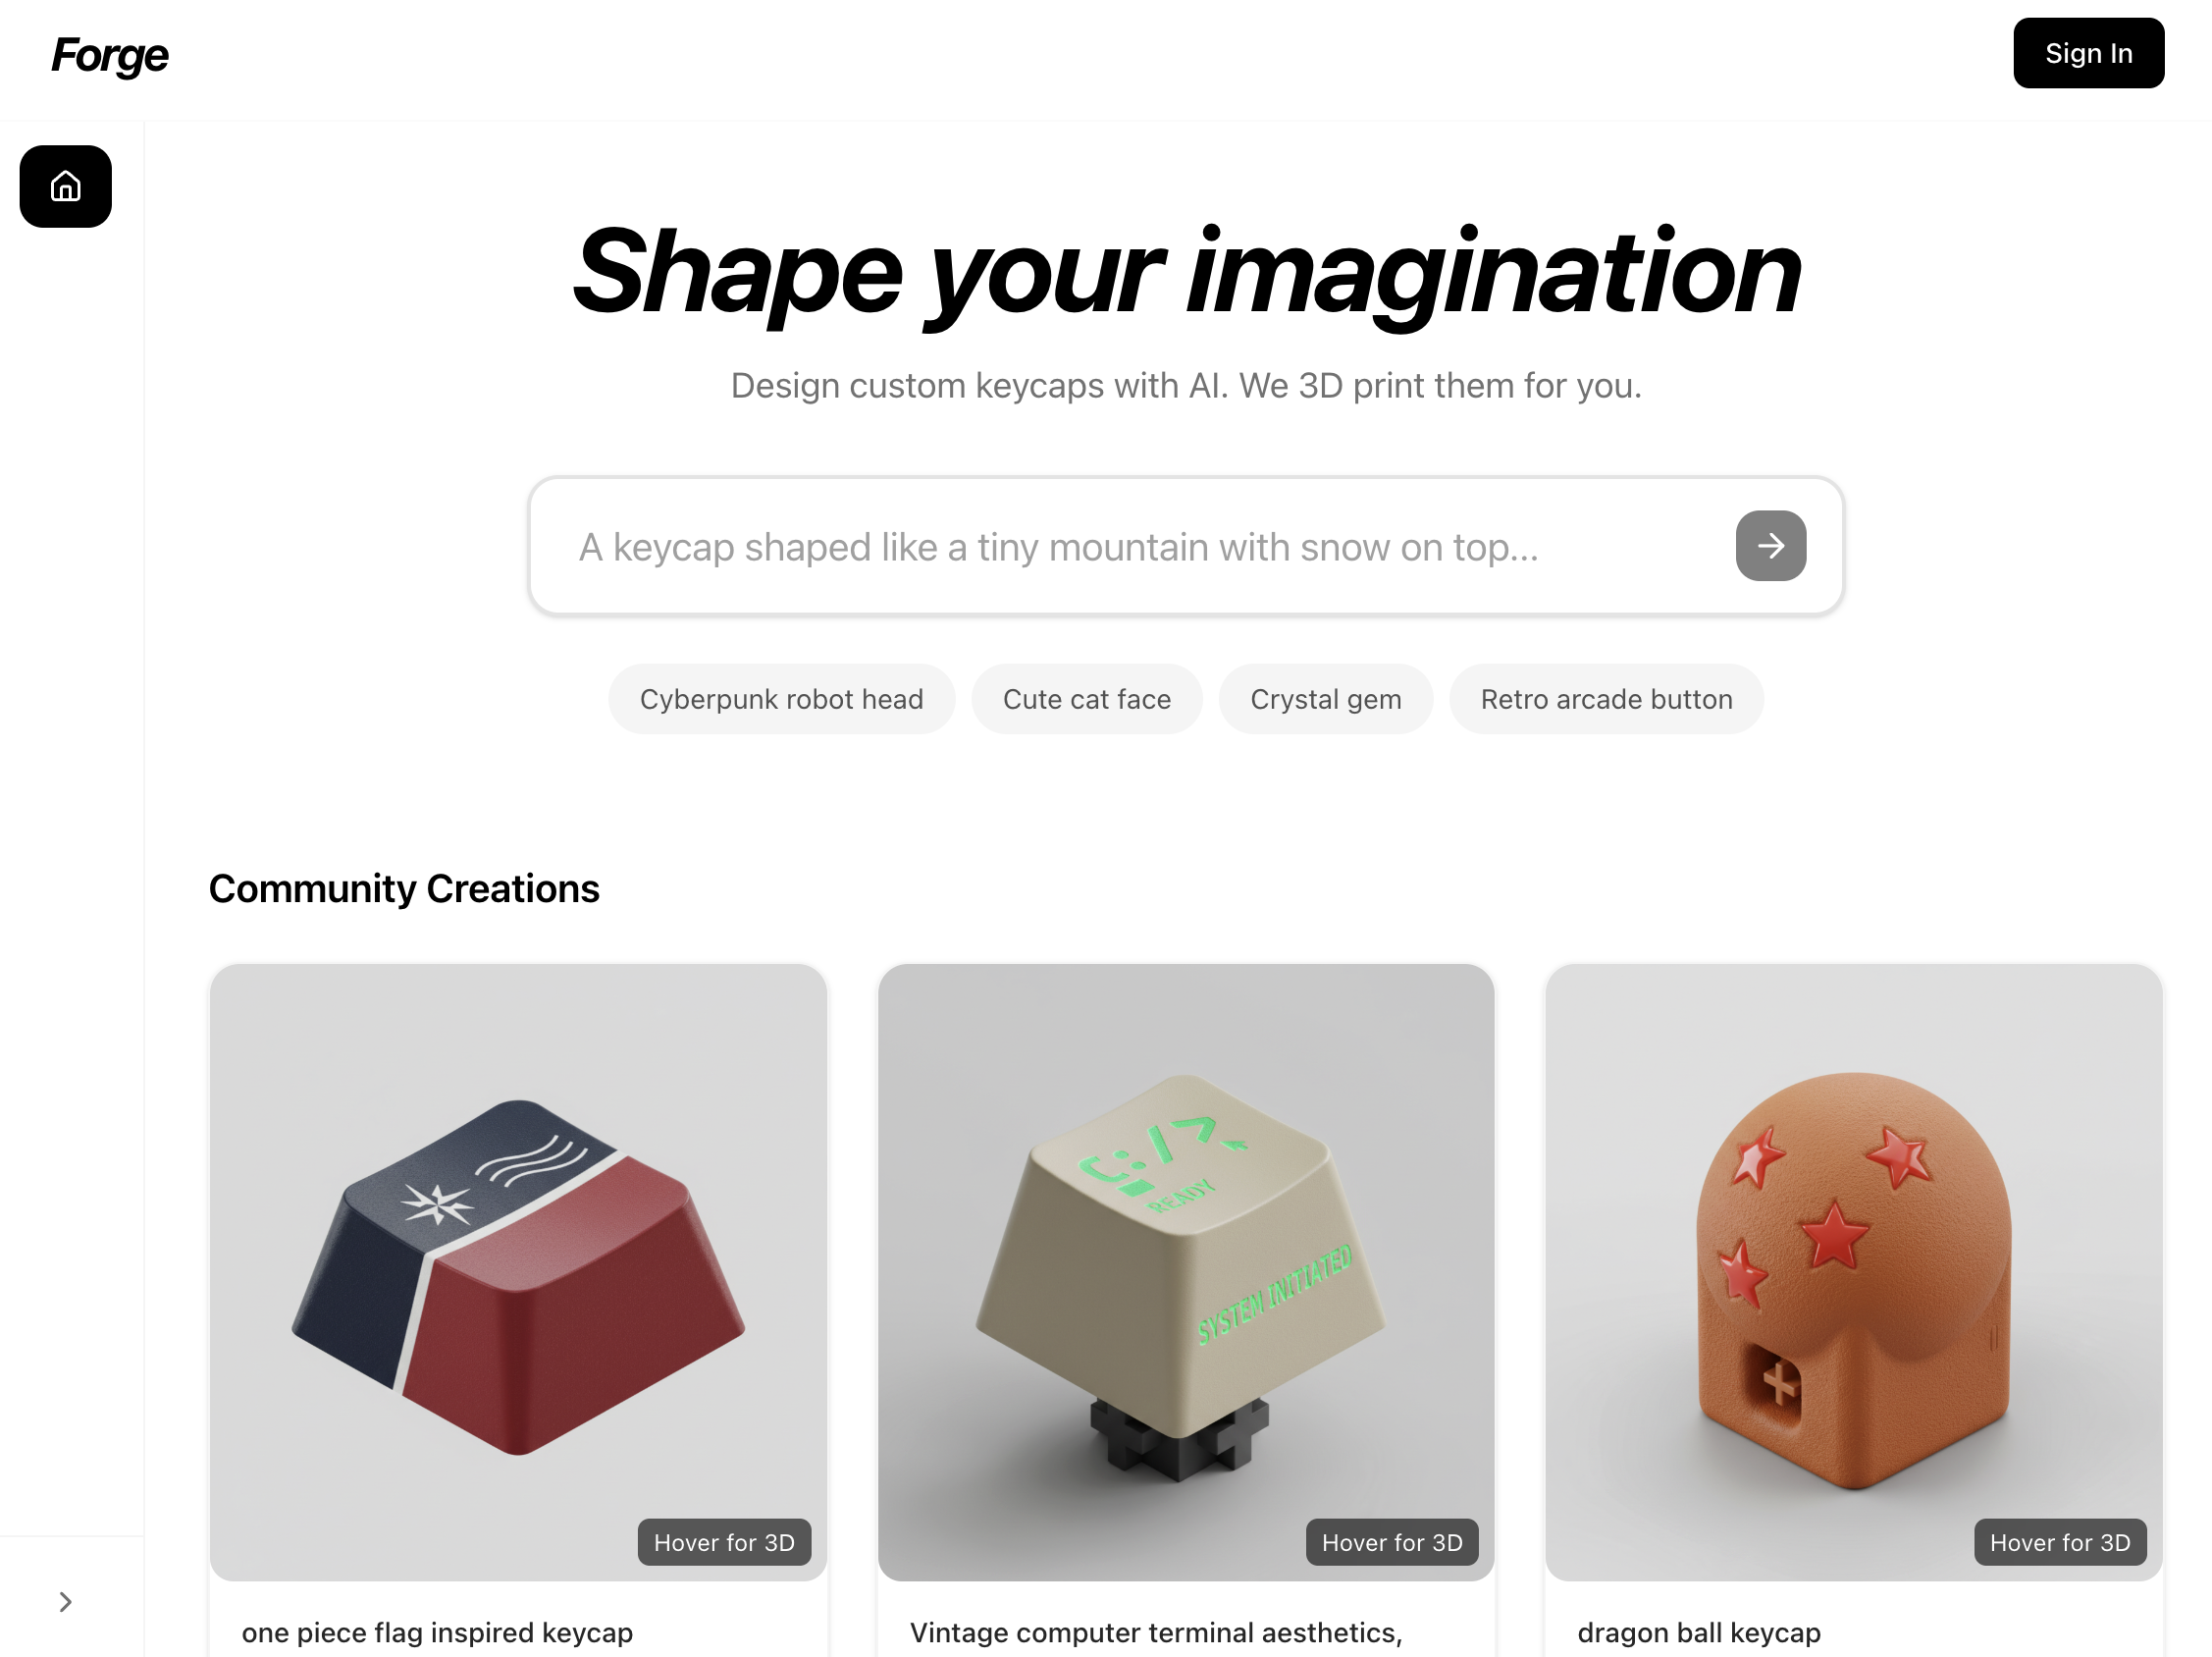
The pipeline is pretty straightforward. You type a prompt describing what you want your keycap to look like. Maybe “a cyberpunk neon keycap with circuit patterns” or “a crystal keycap with aurora colors inside.” You pick your material (PBT, ABS, resin, metal), your profile (Cherry, SA, DSA), and hit generate.
Behind the scenes, we construct a detailed prompt with all the keycap-specific terminology: dimensions, material properties, viewing angle. This goes to Gemini 2.5 Flash which generates a 2D design. That image then gets passed to Trellis, which converts it into a 3D GLB model. The whole thing takes maybe 30 seconds, and you get an interactive 3D preview you can spin around.
Demo
Full walkthrough of the keycap generation process (sped up 1.5x).
Design Philosophy
We took a lot of inspiration from Ideogram.ai. Clean, simple, white-dominated interface with subtle gray accents. The philosophy was “simple and great” but with delightful details. One thing we spent way too much time on was the loading animation: a custom Tetris-style animation where blocks stack up while you wait for your keycap to generate.
For the 3D viewing, we used Google Model Viewer instead of rolling our own Three.js solution. It just works: auto-rotate, camera controls, shadows, all built in. We still use Three.js for some custom animations, but for displaying GLB files, Model Viewer was the right call.
Tech Stack
Smart Prompting
One of the things I worked on was the prompting strategy. When you select “PBT” as your material, we do not just pass that word to the AI. We expand it to “matte, slightly grainy textured surface, no shine, durable look.” Same with profiles: “Cherry” becomes “9.4mm height, low sculpted with subtle cylindrical top curve.”
This domain knowledge made a huge difference in the quality of the outputs. The AI does not know what a Cherry profile keycap looks like unless you tell it the specific dimensions and characteristics.
Challenges
The main challenge was performance. Loading too many 3D models at once in the gallery would kill the browser. We solved this with a hover-to-load pattern: models only load their 3D preview when you hover over the card. Until then, it is just a 2D thumbnail.
We also ran into issues with Next.js image optimization timing out on the AI-generated images (they can be pretty large and variable). The fix was simple: use the unoptimized prop to bypass server-side optimization for generated assets.
Looking Back
We built the whole thing in about a week. It was intense but fun, the kind of project where you are learning new things every day and seeing real progress. Going from “what if we could do AI keycaps” to a working prototype with 3D models you can spin around in your browser, that felt pretty cool.
The next step would be integrating with actual 3D printing services so people can order physical keycaps. But for now, it is a fun proof of concept that shows what is possible when you combine text-to-image AI with image-to-3D pipelines.